
So one of the things I missed most from my F150 was the Homelink feature. I HATE having my garage door opener slid on my visor; not only is it ugly, but it messes up the visor eventually. So I went and purchased a used Homelink module from eBay. Now mind you, I am really handy just not so much so when it comes to painting, trim work, or any other kind of delicate finish work; cutting open and installing something like this I would consider delicate finish work. More so considering I only have 500 miles on this vehicle. But I took the plunge anyway. Installation was surprisingly easy and fairly straight forward. If you follow these steps you shouldn't have any problems.
Required tools:
Phillips screwdriver
Flat head screwdriver
Jeweler's precision flat head screwdrivers
Box knife or seam ripper
Dremel Tool (Optional)
Solder gun
Solder
Heat gun (for heat shrinking material - preferred method for insulating wires)
Heat shrinking material
Black electrical tape if not using heat shrinking material
1 - 2 hours of your time
Two Heinekens (Beer optional for some; needed for most )
)
CLEAN HANDS!! Especially for those of us with light colored interiors
Step 1:
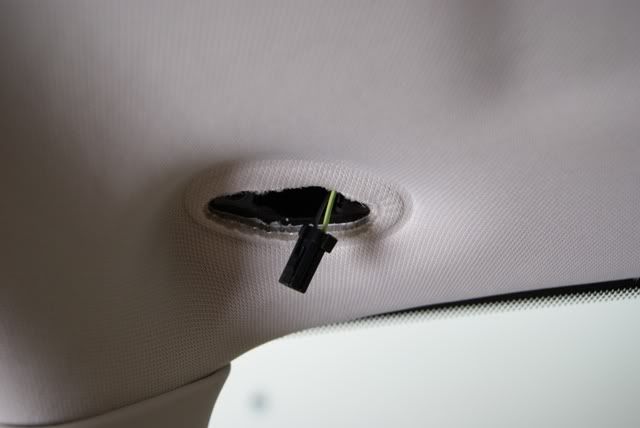
Remove the two Phillips screws securing the driver's side visor to the vehicle and remove the visor. You will need to wiggle it out and down and then unplug the power wire.
![Image]()
Step 2:
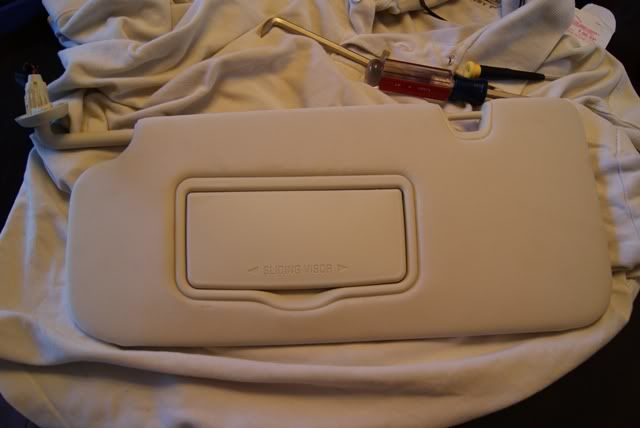
Take the visor to your work area; I would highly recommend placing it on a cloth or otherwise clean surface
![Image]()
Step 3:
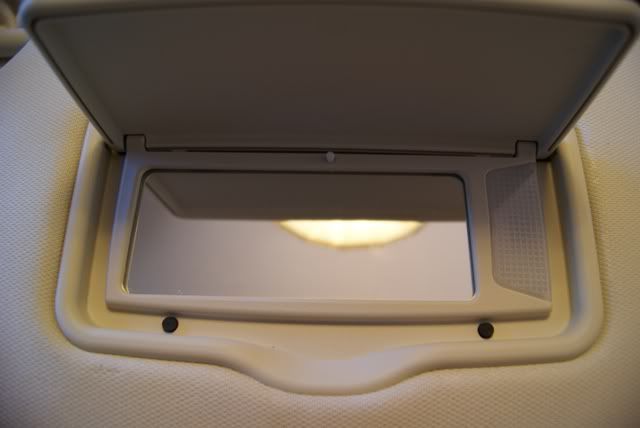
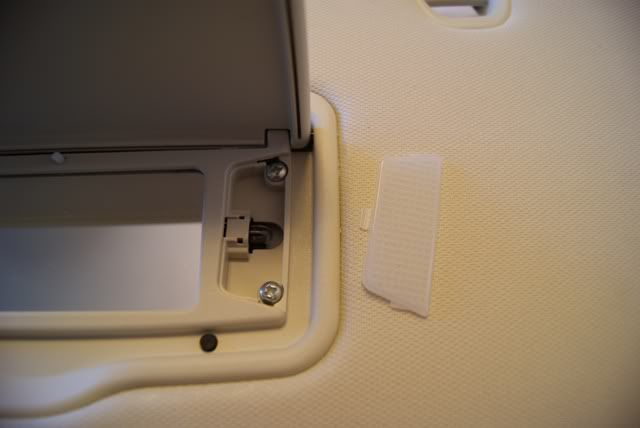
Open up the vanity mirror and remove the light bulb cover; taking a small screwdriver, slide the cover to the right. This now exposes the two screws securing the mirror to the visor
![Image]()
![Image]()
![Image]()
Step 4:
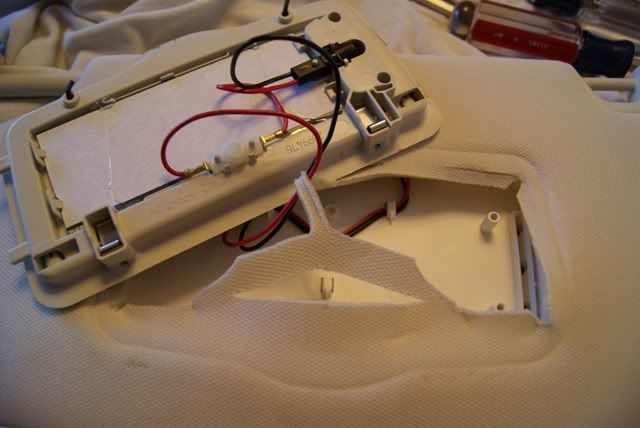
Remove the mirror. Fortunately there is lots of extra wire in the mirror which made splicing into the wiring quite easy
![Image]()
Step 5:
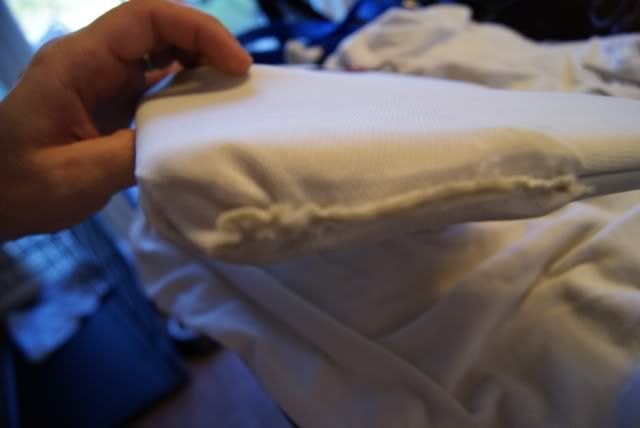
Starting at the lower corner (the corner opposite the visor mounting bracket), take a small screwdriver, gently wedge it between the visor side seams, and pry apart the visor. This will allow you to take another small screwdriver and pull out the visor material. As you can see, the visor material is sewed together, so you'll need to take a seam ripper or razor knife to split open the material. The visor material is held in place by the teeth on both halves of the visor. Pull enough of the visor material away to expose the area that the Homelink module will sit in. You can't miss it. Taking a razor knife or Dremel tool, cut out the area where the module will eventually be installed in.
![Image]()
![Image]()
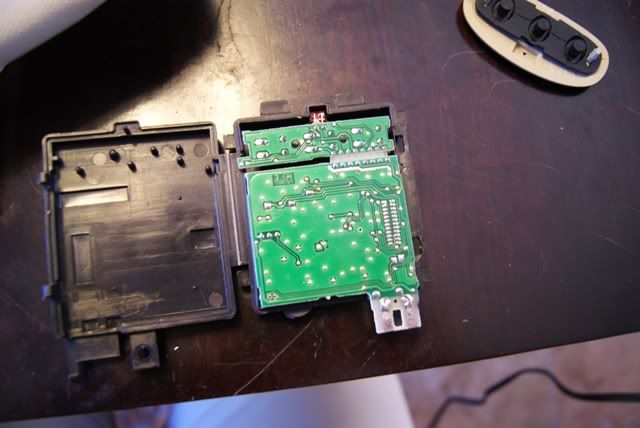
Step 6:
Open up the home link transmitter module by prying open the side. Remove the circuit board.
![Image]()
![Image]()
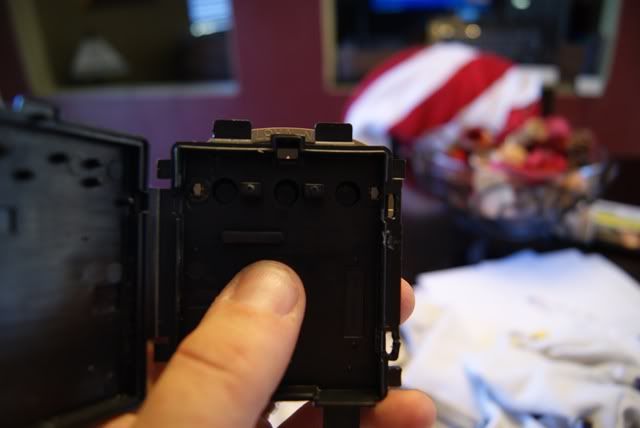
Step 7:
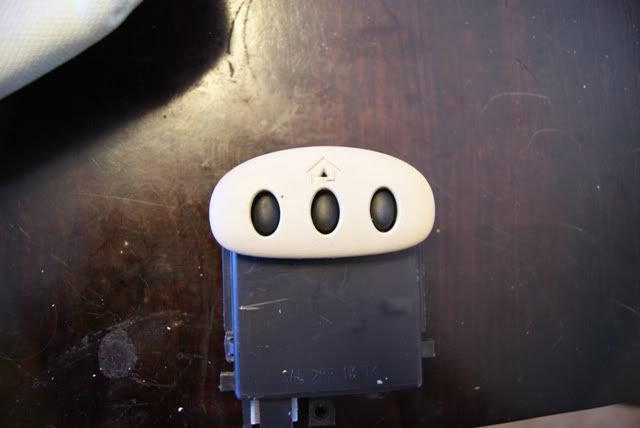
Remove the front button fascia from the module. This is accomplished by squeezing the two pins inside the module housing and prying (gently) out on the fascia. When this is done, replace the circuit board and close up the module housing.
![Image]()
Step 8:
Lengthen the power wires from the module (if needed) and feed the wires to the area where the vanity mirror is installed. There are holes in the visor for this purpose. Install the module in the visor. This is the BIGGEST pain in the .... and the most frustrating part of the job. You'll need patience and a flathead screwdriver. Just be careful when you are prying and pushing on the Homelink module. I found you need to start at the end where the LED is in order to get the module tabs to sit in the recessed areas of the visor. This is what the module should look like when it's installed in the visor.
![Image]()
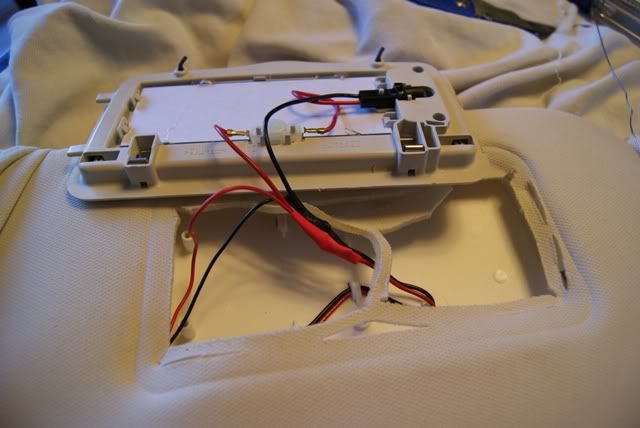
Step 8:
Cut the red and black wires to the vanity mirrors (red is positive; black is negative) and solder these to the wires to the Homelink module. After that is finished either heat shrink insulate them or use electrical tape to insulate them.
![Image]()
Step 9:
Snap the visor back together, but not all the way, this allows for the visor material to be pushed back in at the sides. Pull the visor material tightly and push it in at the sides. When this is finished, fully push the visor back together and reinstall the vanity mirror.
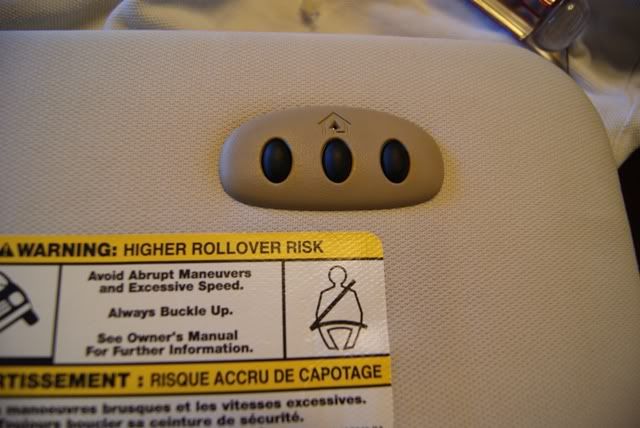
Step 10:
With a razor knife, gently cut out the area where the Homelink LED and button holes are located under the visor material and push on the fascia and rubber buttons. When finished, you should get a nice factory look.
![Image]()
![Image]()
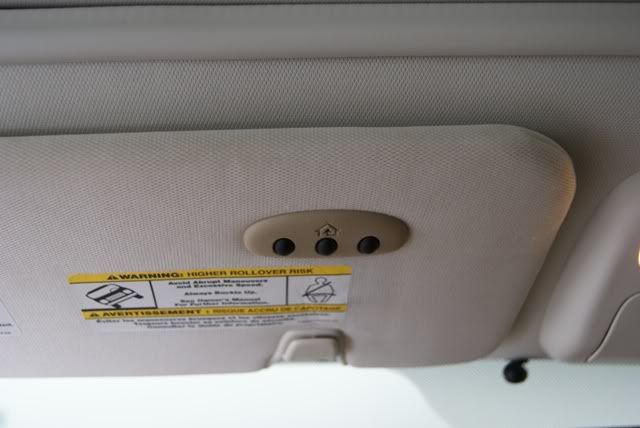
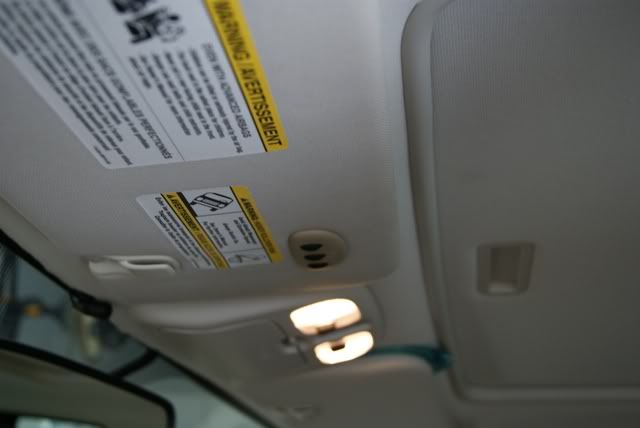
Step 11:
Plug the visor power wires in and reinstall the visor back in the vehicle. Here's a couple of pictures of the installed visor with the Homelink module
![Image]()
![Image]()
Step 12:
Program the Homelink to operate your garage door or lighting. Instructions can be found on Homelink's website. http://www.homelink.com/programming/programming.taf
Required tools:
Phillips screwdriver
Flat head screwdriver
Jeweler's precision flat head screwdrivers
Box knife or seam ripper
Dremel Tool (Optional)
Solder gun
Solder
Heat gun (for heat shrinking material - preferred method for insulating wires)
Heat shrinking material
Black electrical tape if not using heat shrinking material
1 - 2 hours of your time
Two Heinekens (Beer optional for some; needed for most
)CLEAN HANDS!! Especially for those of us with light colored interiors
Step 1:
Remove the two Phillips screws securing the driver's side visor to the vehicle and remove the visor. You will need to wiggle it out and down and then unplug the power wire.
Step 2:
Take the visor to your work area; I would highly recommend placing it on a cloth or otherwise clean surface
Step 3:
Open up the vanity mirror and remove the light bulb cover; taking a small screwdriver, slide the cover to the right. This now exposes the two screws securing the mirror to the visor

Step 4:
Remove the mirror. Fortunately there is lots of extra wire in the mirror which made splicing into the wiring quite easy
Step 5:
Starting at the lower corner (the corner opposite the visor mounting bracket), take a small screwdriver, gently wedge it between the visor side seams, and pry apart the visor. This will allow you to take another small screwdriver and pull out the visor material. As you can see, the visor material is sewed together, so you'll need to take a seam ripper or razor knife to split open the material. The visor material is held in place by the teeth on both halves of the visor. Pull enough of the visor material away to expose the area that the Homelink module will sit in. You can't miss it. Taking a razor knife or Dremel tool, cut out the area where the module will eventually be installed in.

Step 6:
Open up the home link transmitter module by prying open the side. Remove the circuit board.
Step 7:
Remove the front button fascia from the module. This is accomplished by squeezing the two pins inside the module housing and prying (gently) out on the fascia. When this is done, replace the circuit board and close up the module housing.
Step 8:
Lengthen the power wires from the module (if needed) and feed the wires to the area where the vanity mirror is installed. There are holes in the visor for this purpose. Install the module in the visor. This is the BIGGEST pain in the .... and the most frustrating part of the job. You'll need patience and a flathead screwdriver. Just be careful when you are prying and pushing on the Homelink module. I found you need to start at the end where the LED is in order to get the module tabs to sit in the recessed areas of the visor. This is what the module should look like when it's installed in the visor.

Step 8:
Cut the red and black wires to the vanity mirrors (red is positive; black is negative) and solder these to the wires to the Homelink module. After that is finished either heat shrink insulate them or use electrical tape to insulate them.
Step 9:
Snap the visor back together, but not all the way, this allows for the visor material to be pushed back in at the sides. Pull the visor material tightly and push it in at the sides. When this is finished, fully push the visor back together and reinstall the vanity mirror.
Step 10:
With a razor knife, gently cut out the area where the Homelink LED and button holes are located under the visor material and push on the fascia and rubber buttons. When finished, you should get a nice factory look.

Step 11:
Plug the visor power wires in and reinstall the visor back in the vehicle. Here's a couple of pictures of the installed visor with the Homelink module
Step 12:
Program the Homelink to operate your garage door or lighting. Instructions can be found on Homelink's website. http://www.homelink.com/programming/programming.taf